Contents
Why Your Boat Probably Needs Repainted
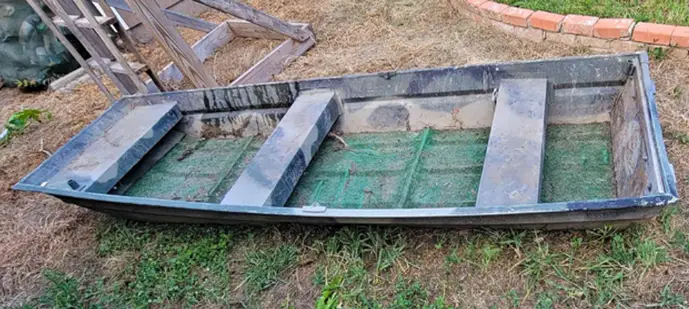
The combination of sun, weather, hitting objects in shallow water and the usual knocks and bumps encountered when hauling can take its toll on your boat.
This inevitably leaves the paintwork cracked, faded and peeling.
Here we show you how to paint your Jon boat the right way while highlighted which Jon boat paint is best for which types of Jon boats.
How To Paint Your Jon Boat
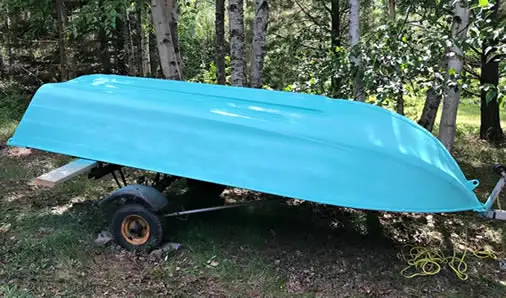
One of the simplest ways of remedying and revitalizing your boat’s appearance is to renew it with a good lick of paint.
This will also prolong the life of your boat.
If you are not a serial boat owner you may not be familiar with the steps involved.
However, with the right method set out before you the task need not be arduous.
In this article let’s run through all the basics for bringing your Jon boat paintwork up to scratch.
If you have the correct materials for your type of Jon boat, the principles for painting it are the same whether you plan to paint metal, wood or fiberglass.
Check out the article outlining the best paint to use for a Jon boat based on its construction material.
Here are some quick tips for getting that desired great finish on your Jon boat.
Preparation is everything
The better you clean, prepare and carry out repairs to your boat before painting, the better the finished result will be.
Rushing the prep will lead to costly mistakes that may mean your boat is not properly protected and you may need to redo the entire process again within a matter months.
Do it right the first time and you will save yourself a lot of time and a lot of frustration.
Once the boat is cleaned and prepared for painting don’t skimp on the primer.
Primed surfaces are even, hide joints and defects and hold the paint better, meaning your Jon boat paint color will be more vivid and require fewer coats overall. And, it will last longer.
Be patient. Work like the pros and build up your paintwork with successive layers, drying and sanding between each one.
Dedicate a prolonged period to getting the paintwork just right – this is not a one-afternoon job.
Caution is advised when using paint thinners, as these may impair the performance of your paint or coating.
Some Jon boat paints, like epoxy-based paints, need a rapid application, so a two-man team may be advisable for the job if you have a large Jon boat.
Brush vs roller vs spray painting
Using a brush to paint your Jon boat is a completely acceptable approach and will result in a lovely finish as long as you apply each brush stroke evenly.
However, roller painting will allow you to finish the job much sooner and the finish is usually identical to that of brush painting.
If you do use a roller be prepared by having a few brushes to hand as you will need a brush to get into those nooks where the roller can’t reach.
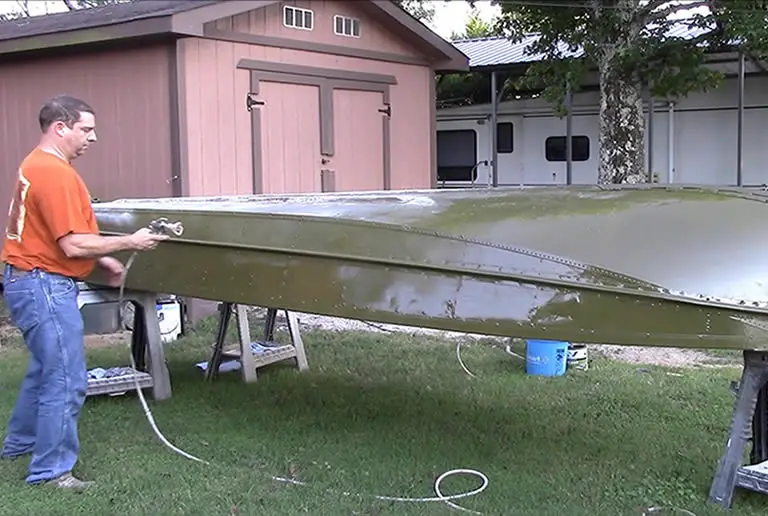
Depending on the space and the equipment you have available you may want to consider using a spray gun to apply the paint to your boat.
Spray painting is by far the most superior method for applying paint to any object.
So a spay painting approach to your Jon boat will result in a quicker application and more even finish than a job done by hand.
The 5 Steps For Painting A Jon Boat
Below are the step by step instructions for preparing your Jon boat for painting and completing the painting work.
Step 1. Preparing you, your paint area and your boat for painting
Firstly, you will need to find a painting location that is sheltered, spacious and dust-free.
You don’t want dirt and dust landing on your newly painting boat while the paint is drying!
Going over a garage or outbuilding with a duster and shop vac should be adequate.
Your Jon boat will need to be balanced on supports, sawhorses or trestles that will afford access to the whole boat.
The interior of the boat can be painted first and once the paint is dried you can flip the boat on its supports to paint the exterior.
However, you should prep both the exterior and the interior before you start painting the boat.
Ensuring the boat is prepped in its entirely reduces the risk of chipping or damaging painted parts of the boat.
This would almost certainly occur if you tried to clean and sand down part of the boat when the other part is fully finished.
It is good working practice to prep both the interior and exterior of the boat fully, by cleaning it and carrying out repairs, before you begin painting.
When undertaking boat painting you will need to protect yourself from fumes and potential accidents by using a mask, safety goggles, and suiting (though old clothes would probably suffice).
This is especially advised if you intend to use a spray gun to apply your coatings and paint.
Clouds of dust, fumes and paint splatter will be generated by your work and you can expect to get hit by them.
Ensure the place where you are working is well ventilated.
If the weather permits you may be better painting the boat outdoors but you must be certain it won’t be in direct sunlight or rain.
If you are working indoors be sure to protect your work area with dust sheets and plastic sheeting.
Step 2. Cleaning the boat for painting
Start by cleaning your boat’s surfaces from dirt, foul and remove any peeling paint.
You can pressure wash the boat and use soap and water before finishing with acetone, or similar, to get all debris fully removed.
You will probably need to sand down the areas of peeling paint on your boat to ensure all peeling paint has been fully removed.
Don’t skip on this step or try to rush the process.
The more effort you put into cleaning and prepping your boat the easier it will be to repair and paint it later and the better will be your results.
Allow the boat to air dry fully before you attempt to paint it or make repairs.
On a wooden boat you can sand it down as part of the cleaning process but be careful not to go too hard on the wood if using a power tool.
Step 3. Make any necessary repairs
Once properly cleaned, inspect your boat thoroughly for dents and defects.
These should be repaired as needed using the appropriate technique or a suitable marine filler.
This is the ideal time to fix even small defects in your boat as they will be completely covered and unnoticeable once you’ve finished painting the boat.
Your Jon boat will now need to be sanded down thoroughly to create a smooth surface to take your primer.
Once sanded down, wash the boat again to remove all dust and dirt and allow it to dry.
At this stage it should be a simple and quick process to wash your boat as the hard work has already been done.
Step 4. Applying the primer
You are now ready to apply your primer.
Primer not only cuts down on the cost of Jon boat paint, meaning it takes less coats to fully cover the boat, but it also helps give the paint a good foundation and hold.
So don’t be cheap by avoiding this step as it will cost you more in the long run.
The only time you can skip using primer is if you are using AlumaHawk or similar type product that already has primer incorporated into it.
Some boat owners use AlumaHawk as a primer only because of its superior quality and then use a standard marine paint afterwards to add a specific color finish.
It can work out to be expensive to use though as you will need to buy at least a gallon.
A quart will not be enough because it will only cover about 40 square feet of the bottom with a very thin coat.
A really good all purpose primer will cover Jon boats of all construction materials and can be sprayed, used on brushes or roller painted easily depending on the equipment you have to hand.
Prime the interior of your Jon boat and allow it to fully dry before priming the boat’s exterior.
As mentioned above be sure both the interior and exterior of the boat have been fully prepped before you start painting anything.
Step 5. Getting your Jon boat fully painted
When your Jon boat primer is fully dry, you are now ready to paint your boat.
Build up your Jon boat paint layer by layer ensuring each coat is fully dried before you sand it down to a smooth finish.
Be 100% positive that the paint has dried before you start sanding or you will ruin the coats that you have applied.
If in doubt leave it out and wait another day to be sure.
You should obviously not sand down the boat after your final coat.
Really high quality, expensive paints may only require one coat. If you value your boat though, and want to avoid repainting for year or two, then layering the paint in separate coats is advised.
If you are camouflaging your Jon boat, choose your base color and layer-on different colors with stencils or outlines as we advise in our detailed camouflaging instructions.
If you are working with more than one color or coating, mask off areas where you don’t want the paint to go.
Finally send us your before and after pictures so we can show off your hard work!
The benefits of painting your Jon boat
Painting your Jon boat not only keeps it looking its best but offers some other great benefits as well.
Benefits of painting your Jon boat include:
- Adding to the longevity of your boat.
- Helping to retain its value.
- Improving performance on the water; correcting hull defects prior to painting in addition to adding a smooth layer of paint will lead to a smoother and faster ride.
- Reducing damage and deterioration to metal hulled Jon boats as the metal will not be directly exposed to the corrosive action of air and water.
- Protecting the hull. A coated or well-painted hull is better able to glide over bottom obstructions and irregularities in very shallow waters.
- Prevention of fouling on your boat. Anti-fouling bottom paint will keep your boat free of accumulated foul.
Of course these are just some of the benefits of painting your Jon boat. There are others.
For example, camouflage paint offers benefits to those who use their Jon boat for sports fishing and hunting.
If you are interested in learning how to camouflage your Jon boat read our article on that here.
How often should a Jon boat be painted?
Painting a Jon boat is usually an annual or biennial task.
You can take your time painting your boat during the colder winters months when you are not out on the water, or the task can be completed quicker in the drier and warmer spring/summer months.
A good coat of quality marine grade paint should last up to two years, depending on how you use your boat and how often you use it.
Heavy boat use in challenging environments and challenging conditions may mean you need to repaint the boat at least once per year though.
If you have a Jon boat that is frequently left out on the water, or even regularly trailered, then take time to inspect its condition. Consider painting it whenever you feel it is needed regardless of your usual maintenance schedule.
A quick lick of paint on a your boat when it looks like it needs it can prevent costly repair bills later.
What are the options for painting a Jon boat?
Your choice of Jon boat paint or coating for your Jon boat will depend on the fabrication material the boat is made of.
Aluminum, wood, and fiberglass Jon boats all differ in their overall maintenance requirements as well as in the preparation for painting and the painting methods employed on each.
Traditionally each different construction material required specific paint types and coatings that were specifically formulated for that material and many boat owners still use those paints today.
However, there are special paints now available that can be used on all construction materials.
Best paints and coatings for Jon boats
For aluminum Jon boats
Aluminum Jon boats are by far the most common type in North America so odds are that your boat is made of aluminum.
Therefore, it is well worth knowing the products that will work best on your aluminum boat and provide protection for it as well as giving a reliable finish.
Below are some types of topside paint, antifouling paint and other relevant coatings that are specifically manufactured for use with aluminum boats.
- Marine enamel paint
offers a classic high gloss finish to your paintwork when properly applied. It is often referred to as topside paint because it is mostly used on the interior of the boat and on areas above the waterline.
- Aluminum boat paint AlumaHawk
- Non-skid coatings
- Marine ablative antifouling bottom paint
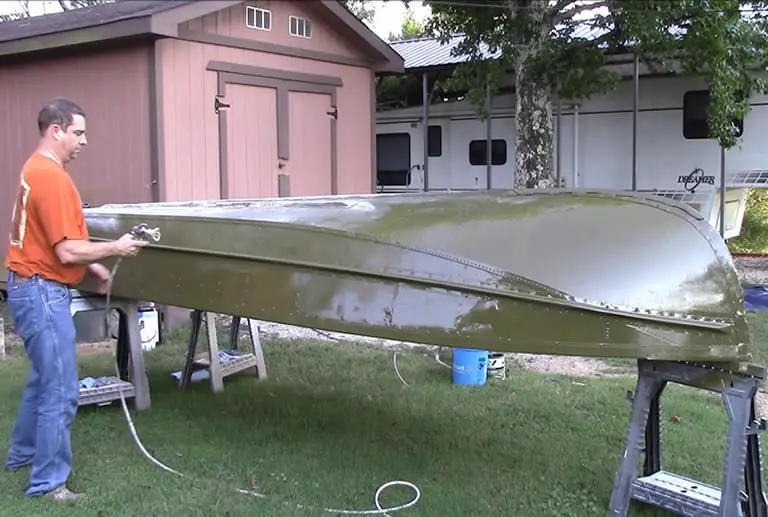
- Camouflage paint gives that classic drab olive finish that is perfect for helping your boat blend into its surroundings if you are a waterfowl hunter. If you want to camouflage your Jon boat read this article for detailed instructions.
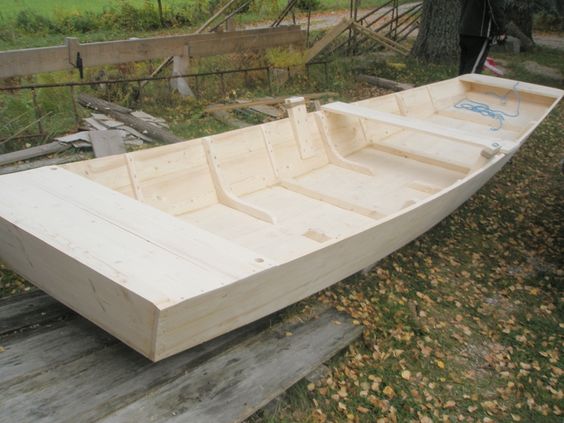
For wooden Jon boats
Almost all wooden Jon boats are homemade.
If you followed our instructions for building your own Jon boat then you will want the correct type of paint to cover it.
Marine wood finishes and paints are easily accessible, relatively cheap and super easy to apply.
Oil-based paints and glosses are the traditional choice for painting a wooden boat and are a great choice because they hold up to the natural flexing and expansion of the wood.
Modern waterproof epoxy-based coatings, used in many modern swimming pools, can also be applied. Be aware though that they often are more toxic, require a quick application and are comparable to gloss in their finish and longevity.
If you don’t like a gloss finish this type of Jon boat paint is not for you.
Yacht varnish can be used to provide a waterproof finish to a suitably prepped wooden boat and this will bring out the grain detail favorably.
Varnish on a well prepared wooden Jon boat can make the vessel look sleek, elegant and expensive.
For fiberglass Jon boats
Fiberglass boats, despite the claims, will need some TLC too.
There are a number of types of paint that will help protect and enhance a fiberglass boat and provide a finish with a good hold.
Good fiberglass one-part paints (traditional paint types) are usually polyurethane based and these can be manually applied by brush or roller or sprayed.
Two part paints are thinner polyurethane paints which are built up in layers and have a hardening agent in them so the paint hardens to create a superior durable finish.
These Jon boat paints are usually only available via a professional coatings firm. This is because they are highly toxic and require specialist breathing equipment and proper ventilation when they are being applied.