
Contents
How To Install A Fishfinder in 3 Quick Steps
Installing a fishfinder on a Jon boat isn’t that difficult.
- You may need an additional transducer if your kit does not include one though.
- The transducer monitors activity in the water. The transducer is attached to a trolling motor or mounted on the transom.
- The transducer is then connected to the fishfinder console which displays the activity below the water’s surface.
- To power the unit you attach the fishfinder directly to your motor’s battery or the boat’s fuse box.
An important thing to check before you begin your fishfinder install
For most Jon boats and similar flat bottomed inland waterway craft a fishfinder will be installed by first placing the transducer on a trolling motor that is attached to the boat or to the transom.
The battery that powers the motor will also power the fishfinder.
You need both a fishfinder and a transducer.
Not all fishfinders come with a transducer so be sure to check with your seller before settling on a model that you like.
Be aware that transducers are expensive and if your kit does not have one you may end up spending a lot more money that you initially intended.
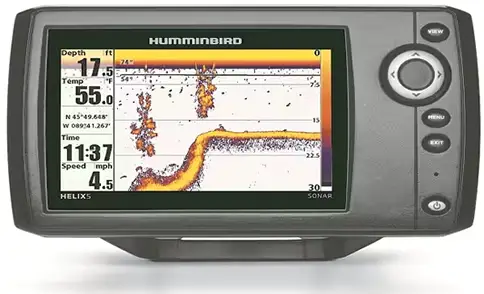
The fishfinder that we recommend comes with the transducer and mounting hardware, power cable and gimbal mounting bracket.
This is the best Jon boat fishfinder, in our opinion, because it is easy to install, works as its suppose and to date it is still going strong after many years of use.
It’s the Humminbird 410210-1 HELIX.
Step 1: Position the transducer – the 2 options
The transducer is the piece of equipment that is situated below the water’s surface and monitors the area below the boat for fish activity.
Although some Jon boat owners prefer to attach the transducer to the transom, the easiest and fastest way is to position it at the bottom of the boat’s trolling motor.
We will cover both options below.
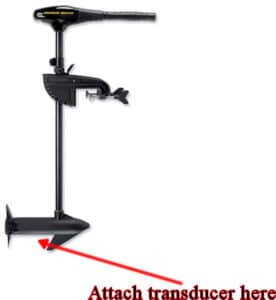
a) Installing the fishfinder on a trolling motor
Placing the transducer at the end of the trolling motor and attaching it with a metal clamp is by far the easiest way to get the monitor placed effectively.
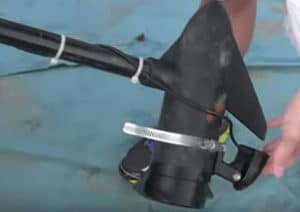
Once the transducer is secured to the bottom of the motor all you then have to do is secure the cable to the shaft of the motor.
This can be done with the aid of simple plastic cable ties.
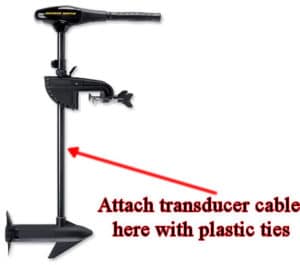
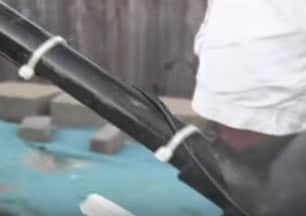
When you reach the top of the trolling motor shaft you then simply attach the cable to fishfinder monitor via its simple plug-in mechanism.
b) Installing the fishfinder on the transom
Some people will place the transducer on the transom rather than the trolling motor, for a more secure and permanent fit.
This involves much more work though.
Before you begin you must choose a spot on the transom that can accommodate the transducer correctly.
When selecting a mounting location ensure both the left and the right sides of the transducer will be free from any type of obstruction.
Obstructions may be picked up by the monitor and will almost certainly block signals and thus give you false readings on the fishfinder console.
Before you settle on a spot to attach the bracket mount make sure the location you have selected will ensure the mount holds the transducer assembly about 1/8″ to 1/4″ below the bottom of the transom.
The transducer needs to be fully submerged in the water for it to work.
Once you are sure you have chosen the right spot for the transducer you must mark holes for the assembly of its mounting bracket.
If you go with the Humminbird model, that we recommended here, mounting the bracket is easy as it comes with a paper template for attaching the included transducer to the transom.
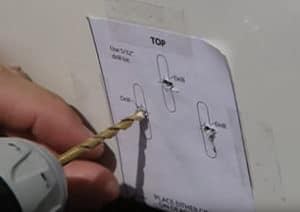
Simply stick the paper template to your chosen spot and mark the spots indicated using a 5/32″ drill bit.
The mounting bracket should then fit over the holes neatly.
Once you have confirmed that the bracket holes are positioned correctly (which they should be) drill the marked holes to a depth of approximately 1″.
Then fill the holes with this type of marine grade silicone.
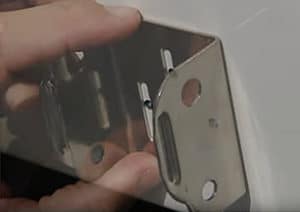
Align the mounting bracket with the holes and attach it with screws that are included in your kit.
Now attach the transducer to the pivot provided using the bolts supplied with the kit.
This is super easy and intuitive to do.
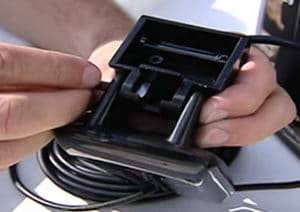
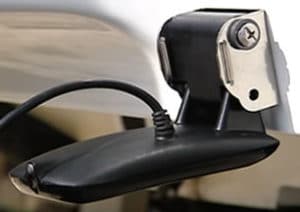
The transducer is now assembled and ready to be attached to its mounting bracket.
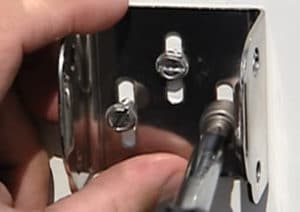
This is as easy as placing the transducer, pivot first, into the bracket and attaching it by inserting the accompanying bolt and tightening it.
Be aware that there will be a limited amount of movement with the transducer.
Movement in the transducer is completely normal and does not mean you assembled the unit wrongly or that it is faulty in any way.
The process of routing the cable from the transom to the fishfinder may differ depending on your boat but this part of the installation is pretty straightforward.
All you have to do is secure the cable to the boat in some way.
In the Humminbird manual, that comes with the fishfinder unit, it covers several different ways to route the cable depending on your boat type.
Step 2: Connect the transducer to the fishfinder console – the 2 options
The transducer is the eyes and ears of the fishfinder; it monitors the water below your boat and sends the signals back to the fishfinder main console unit.
However, it is the fishfinder console that displays all the data being collected by the transducer.
It shows the data in a visual way that lets you know if there is fish activity happening below the water’s surface.
Therefore to get the images you need from the console it must be attached to the transducer.
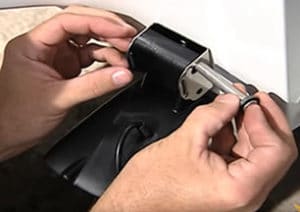
The fishfinder console has a female port where you connect the cable from the transducer. It plugs in easily.
i) Battery connection
The fishfinder is then connected to your troll motor battery in the same way you connect the motor; positive to positive and negative to negative.
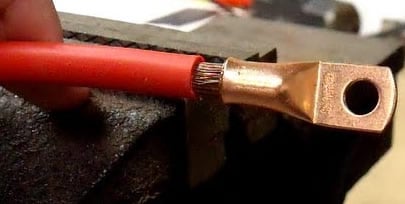
Regardless of which fishfinder you purchase you will almost certainly have to adjust the power cord so it fits your intended power source, i.e. you may need to attach terminal rings to the power cord.
The fishfinder draws power from the battery and the transducer then draws power from the fishfinder.
Rather than connecting the power cord directly to the battery you may want to consider connecting a simple fuse box to the battery like the one in the video below.
Get this fuse box with additional bus bar here.
ii) Fuse box connection
If you have a bigger boat that has a fuse box then you will probably want to connect the power to that rather than connecting it directly to the battery.
To do this you will need additional power connector plugs. You need two power connectors that will fit the connections on your boat’s fuse box.
You may need to attach smaller ring terminals to the fishfinder if it already has ring terminals designed to be connected directly to the battery.
In your fuse box look to see if there are any empty connectors. If you do have available connections simply hook up the fishfinder power to the accessory power plugs.
In my Jon boat fuse box there were additional empty connectors that made connecting the fishfinder super easy. Small standard terminal rings worked great.
If you don’t have additional connectors in your fuse box consider getting the fuse box mentioned in the video above or seek the assistance of an electrician or someone who has experience with these things.
Step 3: Mount the console to complete the fishfinder install process
On a Jon boat you don’t have the same type of space or decking that you have on bigger boats so the positioning of your fishfinder console may a concern for you.
The easiest option is to get a thick piece of square, or rounded, wood and permanently attach the console to that.
This way you can disconnect the console from the transducer and battery and take it with you when you are not in the boat.
This also gives you the option of moving the console to different locations on the boat as the need arises.

If you prefer a more permanent solution then you should consider a deck mount like this.
These mounts come in all shapes and sizes and it is easy to find one that fits your specific fishfinder model.
Most will swivel giving you 360 degree access to the console.