In this article I will cover teh reasons water gets into both a sit in kayak and a sit on top kayak. Most times there is a different reason for water leakage on each type of boat.
If you are currently stuck outdoors with a water-filled kayak you may want to read the article how to get water out of a kayak before reading this one.
Contents
- Why Does My Kayak Fill With Water?
- How Water Gets Into A Sit On Top Kayak
- How Water Gets Into A Sit In Kayak
- Stopping Small Amounts Of Water Getting Into A Kayak Is Easy
- Stopping Large Amounts Of Water Are Getting Into A Kayak May Involve Extensive Repairs
- Recap: The Common Reasons Why A Kayak Fills With Water & Their Fixes
Why Does My Kayak Fill With Water?
If large amounts of water are getting into your kayak check it for hull damage. Check the fittings are secure and watertight. Check hatch gaskets are not worn.
Depending on which type of kayak you have that is causing you the problem there will be slightly different checks to perform.
Why it can be dangerous if too much water gets into a sit in kayak
If you find that small amounts of water are getting into your kayak don’t panic.
It is totally normal for some water to get into the cockpit of a sit-in kayak and to get onto the deck of a sit-on-top kayak.
The top of the boat is practically sitting just above the water line after all.
With such a low freeboard on a kayak you have to expect water to get into your boat even if the water is just being carried in from your paddle.
Obviously though, if large amounts of water are getting into your kayak this is probably a sign of a much bigger problem.
Let’s take a look at the potential problems that could be causing the issue of water getting inside your kayak.
Why there is less cause for concern if water gets into a sit on top kayak
If a small amount of water is getting into the deck area of your sit-on-top kayak it is probably not much to worry about.
But, even though small amounts of water getting onto the deck area of a sit-on-top kayak is a small problem it can still be annoying.
No-on wants to paddle in the wet. So, I will cover the reasons for this happening and the fixes for it – if fixes are available.
If large amounts of water are getting into your deck area there may be more complex problems and fixes involved.
As there are 2 different types of kayak, sit-in and sit-on-top, we obviously need to approach the problem of water leakage from two different angles.
How Water Gets Into A Sit On Top Kayak
In most cases cases a sit on top kayak will take on water do to the open nature of its deck.
It is perfectly normal for a sit on top kayak to have a small amount of water on the deck area.
If the boat is taking on a lot of water then perform the checks mentioned in the bullet list above. Also check the entire kayak for hull damage, as I have outlined later in this article.
Checks to ensure your sit on top kayak is watertight
Sit on top kayaks check:
- The rudder and pedal mechanism are secure.
- Fittings are watertight.
- Check the drainage plug and scupper plugs for damage or for a bad fit.
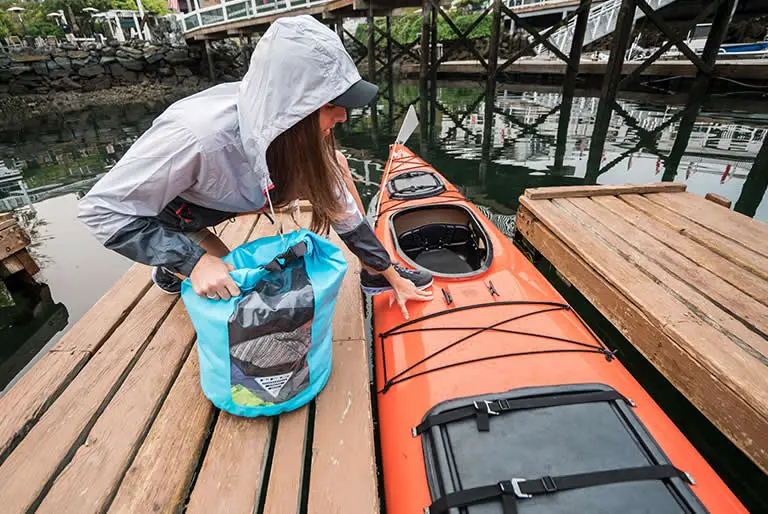
How Water Gets Into A Sit In Kayak
Just like a sit-on-top kayak, if small amounts of water are getting into the cockpit of your sit-in kayak it is probably nothing to worry about.
If larger amount of water are getting into the cockpit then you may have bigger problems.
Checks to ensure your sit in kayak is watertight
Sit in kayaks check:
- The compartment hatches are watertight.
- Check your spray skirt for holes.
- Replace any damaged fittings.
- Apply sealant to all possible leak areas.
Let’s look at the potential causes for water getting into your kayak and the ways in which you can prevent this from happening in the future.
What to do when small amounts of water are getting into the cockpit
Water in the cockpit of a sit in kayak is not that much of a problem, unless of course there is a large amount of it.
However, it can be uncomfortable having water sloshing about around your feet as you paddle so you will likely want to stop this from happening.
Most water gets into the cockpit from splash and not from leaks.
Check your spray skirt is in good order and that it fits securely around the cockpit opening so no water can slip through.
Be sure there are not small holes in it.
Small holes are very easy to miss in a spray skirt and even just a few almost imperceptible holes can let enough water into the cockpit where it becomes annoying over time.
If you are not using a good quality spray skirt get one!
Try fitting one when you go out on the water and you may be surprised at how easily you have just eliminated your problem.
What to do when large amounts of water are getting into compartments
If large amounts of water are getting into the cockpit of a sit-in kayak you have damage somewhere in the hull.
You will likely need to take your kayak to a specialist so they can restore the integrity of the hull.
If you want to try a home repair watch the following 2 videos.
Plastic kayak repair (video)
However, many of the problems that can allow a lot of water to get into the compartments of sit-in kayak are the same problems that let water into a sit-on-top kayak.
So let’s re-look at those.
The first thing to do is to check the hull for damage look for holes that could be letting the water in.
Holes are easier to fix than cracks because there are easier immediate fixes as you can see in the video below.
Again if you want to use a home fix try the advice in the following video.
Home fix kayak repair (video)
If there is no sign of hull damage look at the fittings to make sure they are tight.
Consider applying some silicon sealant to points where the fittings hit the hull for extra protection against leaks.
If you find that you only need to re-tighten fittings apply some silicon sealant anyway just to be sure.
Contrary to popular belief by beginners, there are no scupper holes in a sit-in kayak.
If you see some, they are not scupper holes but just regular holes and you need to fix them. 😉
Stopping Small Amounts Of Water Getting Into A Kayak Is Easy
If you start to notice small amounts of water gathering inside your kayak, say a few cups over the space of a few hours, then the culprit probably lies with your boat’s hatches.
Well maintained hatches will not let in water.
However, water can splash up over the hatches and rest in the gaps only to fall into the boat when the hatch is open.
This is not a big problem and is unlikely to be the cause of water in your boat. It is much more likely you have a faulty hatch.
Worn gaskets in hatchets can lead to small amounts of water getting into your kayak and over time time these small amounts start to grow bigger.
Marine grade silicon sealant can fix most small leaks
This is an easy fix by either fitting a new gasket, a new hatch or just by using some seal tape if the problem isn’t that bad.
I always advise to replace worn parts rather than trying to patch them up though; you are just creating a bigger problem for a later date if you patch instead of replace.
You don’t want to have several repairs to make that keep you off the water simply because you didn’t make minor repairs to problems as you encountered them.
If the water is not getting into your kayak via the hatches then the next place to look is at the fittings.
Are there any lose deck fittings that may be letting in water?
If you come across any lose fittings simply screw them back in tight and as an additional measure use some good grade marine silicon sealant at the point where the fitting meets the hull.
If need be, replace the fitting.
I always advise people to use sealant as an extra measure because once a fitting comes lose it never really fits back in as tightly again – even new ones may not be as tight a fit because the holes have widen fractionally.
Next, check the rudder lines. Are they perfectly sealed into the holes? Again sealant is your friend.
Using some silicon sealant around these areas creates an even more secure point denying water any access.
Stopping Large Amounts Of Water Are Getting Into A Kayak May Involve Extensive Repairs
If a large amount of water is getting into your sit-on-top kayak the first thing to do is look for a crack in the hull.
If there is sign of hull damage you will probably need to take the boat to a specialist to get fixed.
If you want to attempt a home repair watch the video below.
Hull damage is the most serious reason for water getting into a kayak
If there are no signs of obvious hull damage the next thing to check is the drainage plug. Is it securely and tightly screwed in? Are there signs of wear on the gasket and thread?
Again replace any worn parts and use sealant to create a secure watertight fit.
If the problem is not with the drainage plug, look next at the scupper holes.
Scupper holes are an important safety feature on a sit-on-top kayak, especially a sit-on-top kayak being used by a beginner, so check that they are not clogged up.
If the scupper holes are clear then you may need scupper plugs so you actually can clog up the holes. Why would you do that?
Well, scupper holes can sometimes let in more water than they drain away.
For example, if you are paddling over large waves in your kayak, it is likely that much more water will make its way up through the scupper holes than makes it way out of them.
In circumstances like this scupper plugs are useful.
If you are not using supper holes and are kayaking in very choppy water this could be the reason for water build-up inside your boat.
Get some good quality universal scupper plugs that are sure to fit your kayak and carry them with you at all times on the water in case you need them.
If you already use scupper hole plugs then check them for damage and make sure they are a tight fight.
Do not use sealant on scupper hole plugs because you will definitely want to remove them under certain conditions!
Learning when to use scupper plugs and when not to use them usually comes down to experience.
If you are unsure simply ask other kayakers who frequent the same waters you do when you should use plugs and when you should not.
If the scupper holes or scupper plugs are not the problem your next port of call is the seat plugs.
Check the seat where it is fastened to the hull to see if there are any cracks or obvious signs of wear. It is all too easy for water to get through damaged seat plug holes.
Replace any word parts and, again, sealant is your friend.
If your sit-on-top kayak is fitted with a pedal system look at this very carefully. Is it secure and sealed properly where it is attached the hull?
Easy repair for cracked kayaks (video)
In most instances you will be able to fix most of the problems listed above yourself.
However, if you find that the problem still persists or you find an indication of more serious damage to the hull of your kayak you will likely need to seek professional assistance.
Get a lightweight, hand-operated bilge pump, like this one, so that you have an efficient way of removing water from inside your kayak quickly and easily.
Recap: The Common Reasons Why A Kayak Fills With Water & Their Fixes
As long as there is no hull damage done to your boat you can fix most of the leakage problem yourself very easily.
As you can see in the videos above many problems that stem from hull damage can be fixed at home with some ingenuity and a few clever products.
If you do perform your own hull repairs be sure to test the boat in a safe environment before heading out on a trip especially if you like whitewater kayaking or touring in the ocean or open waters.
Where you can, get replacements for damaged or worn parts.
Use good grade marine silicon sealant around fittings to give them extra protection.
And if you’re feet are getting wet, get a spray skirt!
Get a lightweight, hand-operated bilge pump, like this one, that you can easily carry with you on your kayak.
A portable bilge pump makes it easier to remove water from inside a sit-in kayak.
You can pump bilge water out of a kayak compartment and the cockpit a lot easier than you can get it out by turning the boat over or by trying to soak it up with something like foam.